Local MCP Server
Connect a local Claude, Codex, opencode, or Kimi agent so it can drive the editor and build your game.
Connect a local Claude, Codex, opencode, or Kimi agent so it can build your game by driving the editor directly. The agent runs in your terminal with its own model, and its actions show up in the editor's chat. It talks to the editor over MCP (Model Context Protocol) — the open standard that lets AI agents use external tools — through @vibegames/editor-mcp.
Before you start
You'll need:
- Node.js installed — the setup runs
npx. - The Claude, Codex, opencode, or Kimi CLI installed and signed in.
- A supported browser (see Browser support).
Turn it on
- Open Settings → Configure AI and enable Local MCP Server.
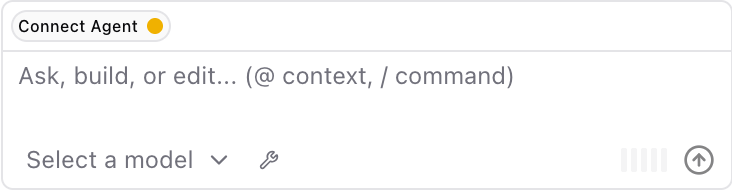
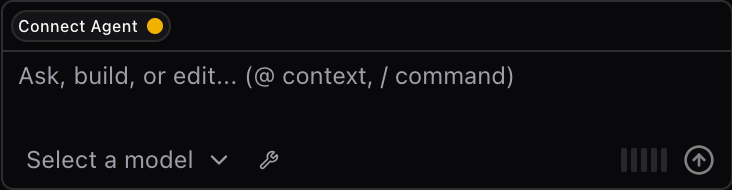
- In the chat panel, click the Connect Agent badge (in the header above the message box) to open the setup popup.
- Pick your agent (Claude, Codex, opencode, or Kimi), then follow the steps for that agent below.
Connect Claude
1. Install (once) — run in your terminal:
claude mcp add vibe-games-editor --env VIBEGAMES_MCP_SESSION='${VIBEGAMES_MCP_SESSION}' -- npx -y @vibegames/editor-mcp2. Start session — copy the command from the popup (your token is already filled in) and run it:
VIBEGAMES_MCP_SESSION='<your-token>' claude$env:VIBEGAMES_MCP_SESSION='<your-token>'; claudeClaude connects, and the badge in the editor switches to Agent connected.
Connect Codex
1. Install (once) — add this to ~/.codex/config.toml (on Windows, %USERPROFILE%\.codex\config.toml; create the file if it doesn't exist yet):
[mcp_servers.vibe-games-editor]
command = "npx"
args = ["-y", "@vibegames/editor-mcp"]
env_vars = ["VIBEGAMES_MCP_SESSION"]
2. Start session — copy the command from the popup (your token is already filled in) and run it:
VIBEGAMES_MCP_SESSION='<your-token>' codex$env:VIBEGAMES_MCP_SESSION='<your-token>'; codexCodex connects, and the badge in the editor switches to Agent connected.
Connect Codex app
The Codex desktop app reads the same ~/.codex/config.toml, so the install step above covers it too. Start a session by launching the app with the token set:
VIBEGAMES_MCP_SESSION='<your-token>' codex app$env:VIBEGAMES_MCP_SESSION='<your-token>'; codex appCodex connects, and the badge in the editor switches to Agent connected.
Connect opencode
opencode has no install command — add the server to its config file instead.
1. Install (once) — add this under "mcp" in your opencode config. Use the global file at ~/.config/opencode/opencode.json, or a project-level opencode.json in the folder you launch opencode from (create the file if it doesn't exist yet):
{
  "$schema": "https://opencode.ai/config.json",
  "mcp": {
    "vibe-games-editor": {
      "type": "local",
      "command": ["npx", "-y", "@vibegames/editor-mcp"],
      "enabled": true,
      "environment": { "VIBEGAMES_MCP_SESSION": "{env:VIBEGAMES_MCP_SESSION}" }
    }
  }
}
2. Start session — copy the command from the popup (your token is already filled in) and run it:
VIBEGAMES_MCP_SESSION='<your-token>' opencode$env:VIBEGAMES_MCP_SESSION='<your-token>'; opencodeopencode reads {env:VIBEGAMES_MCP_SESSION} from that variable, connects, and the badge in the editor switches to Agent connected.
Connect Kimi
Kimi (Kimi Code CLI) has no install command — add the server to its config file instead.
1. Install (once) — add this to ~/.kimi-code/mcp.json (on Windows, %USERPROFILE%\.kimi-code\mcp.json; create the file if it doesn't exist yet):
{
  "mcpServers": {
    "vibe-games-editor": {
      "command": "npx",
      "args": ["-y", "@vibegames/editor-mcp"]
    }
  }
}
Kimi also reads a Claude-style .mcp.json from your project root, if you prefer a per-project setup.
2. Start session — copy the command from the popup (your token is already filled in) and run it:
VIBEGAMES_MCP_SESSION='<your-token>' kimi$env:VIBEGAMES_MCP_SESSION='<your-token>'; kimiKimi passes your shell's environment through to the MCP server, connects, and the badge in the editor switches to Agent connected.
Check it works
Once the badge shows Agent connected, ask the agent to do something and watch the editor:
Use vibe games editor mcp. Add a spinning cube to the scene.
The agent's tool calls appear in the editor's chat as it works. If the badge ever shows Agent disconnected, run the Start session command again.
Keep this editor tab open while the agent is connected — the token lives only in this tab.
Browser support & troubleshooting
| Browser | Works? | Notes |
|---|---|---|
| Chrome / Edge / Brave | ✅ Yes | Allow the Local Network Access prompt on first connect. |
| Firefox | ✅ Yes | |
| Safari | ⚠️ Maybe | Allow the local-network prompt if macOS asks. |
- The install command fails — make sure Node.js is installed; the command relies on
npx. - The agent never connects — you may have dismissed the Local Network Access prompt. Re-enable it from the lock icon in Chrome's address bar, then reload and run Start session again.